

Your README is the first file people read in your project, and sometimes the only one.
Think of it as the project’s landing page. It should help someone quickly understand what you built, why it matters, and whether they should explore it further. This applies to pet projects, course submissions, and portfolio projects you create to support a job application.
At my previous job, I was heavily involved in hiring. I conducted the first technical screening after the recruiter call, which meant reviewing candidates’ profiles and projects. I would open a repository, scan the README, and decide within about ten seconds whether to continue. Most of the time, I wouldn’t continue. If the README didn’t tell me what the project was about or how to run it, I wouldn’t spend time trying to figure that out myself.
I now see the same problem in the courses I run. Each cohort produces hundreds of student projects, and all of my courses use peer review, in which participants assess one another’s work against a set of criteria.
Reviewers need to understand the problem, inspect the implementation, and determine which criteria the project satisfies. A README that makes this difficult can cost the author course points. I have seen projects lose points because important work, such as evaluation results, was buried several notebooks deep and never mentioned in the README.
In this article, I'll explain how your README should look like, which sections it should contain, and who you should write for, so your project gets the attention it deserves.
It's an extended version of the material I prepared earlier this year to the students of my AI Engineering Buildcamp course. Right now the participants of LLM Zoomcamp will find it especially useful, but the same principles apply to the other Zoomcamps and to most engineering projects.
Throughout the article, I will use one running example: Fitness Assistant, a RAG application that helps users find exercises and suitable alternatives. I built it two years ago as a reference project for LLM Zoomcamp. The repository was already in reasonable shape, but I refined its README further while preparing this article.
Start with the reader
Before you write a README, think about the person who is going to read it.
I suggest writing for three audiences at once: peer reviewers, hiring teams, and your future self.
Peer reviewers
The first audience is someone assessing your project against a list of criteria.
In the Zoomcamps I run, participants review one another’s projects and decide how many points each submission earns. They need to find evidence for the problem description, evaluation, monitoring, reproducibility, and other criteria.
Even when your project is not part of a course, it helps to imagine that it will be reviewed this way.
An imaginary peer reviewer gives you a useful standard. Assume that someone will inspect the repository carefully and ask whether you have covered the important parts of the project. Your README should help them find the evidence without searching through every file and notebook.
Hiring teams
The second audience is the hiring team.
A recruiter, hiring manager, or engineer may not spend as much time on the initial review. They first want to understand what the project is and whether it is relevant to the role. Only then will they decide whether to inspect the implementation, evaluation, tests, or architecture in more detail.
This is why optimizing for a peer reviewer is still useful. The README should be easy to scan, but it should also contain enough detail for a technical reader who decides to go deeper.
Your future self
The third audience is your future self.
After several months, you may return to the repository and no longer remember how the project works, how to run it, why you made certain decisions, or what you planned to improve.
A good README should give you enough context to understand the project without reconstructing it from the code and commit history.
Write for all three
These audiences are different, but their needs are compatible.
The hiring team needs a clear overview and a reason to continue. The peer reviewer needs evidence and detail. Your future self needs enough context to understand and continue the work.
The strongest README supports all three: it is easy to scan at first, detailed enough to inspect, and complete enough to return to later.
What does the reader need to understand?
Most readers approach a project with four broad questions:
What is this project?
Does it work well?
Can I run and reproduce it?
How was it built?
Let’s start with the first question.
Part 1: What is this project?
Readers need to understand what you built.
The beginning of the README should answer three questions:
Who is the project for?
What problem does it solve?
What did you build to solve it?
Use the title and short description to provide the immediate answer. Then explain the problem in more detail and show how the project works.
1. Title and description
Start with a clear project title and one or two sentences that describe the user, the problem, and the solution.
Avoid opening with a list of technologies. This tells the reader which tools you used, but not what the application does or why anyone would use it.
For Fitness Assistant, I use this description:
A conversational AI that helps users choose exercises and find alternatives. It makes fitness more approachable for beginners who find gyms intimidating or cannot always access a personal trainer.
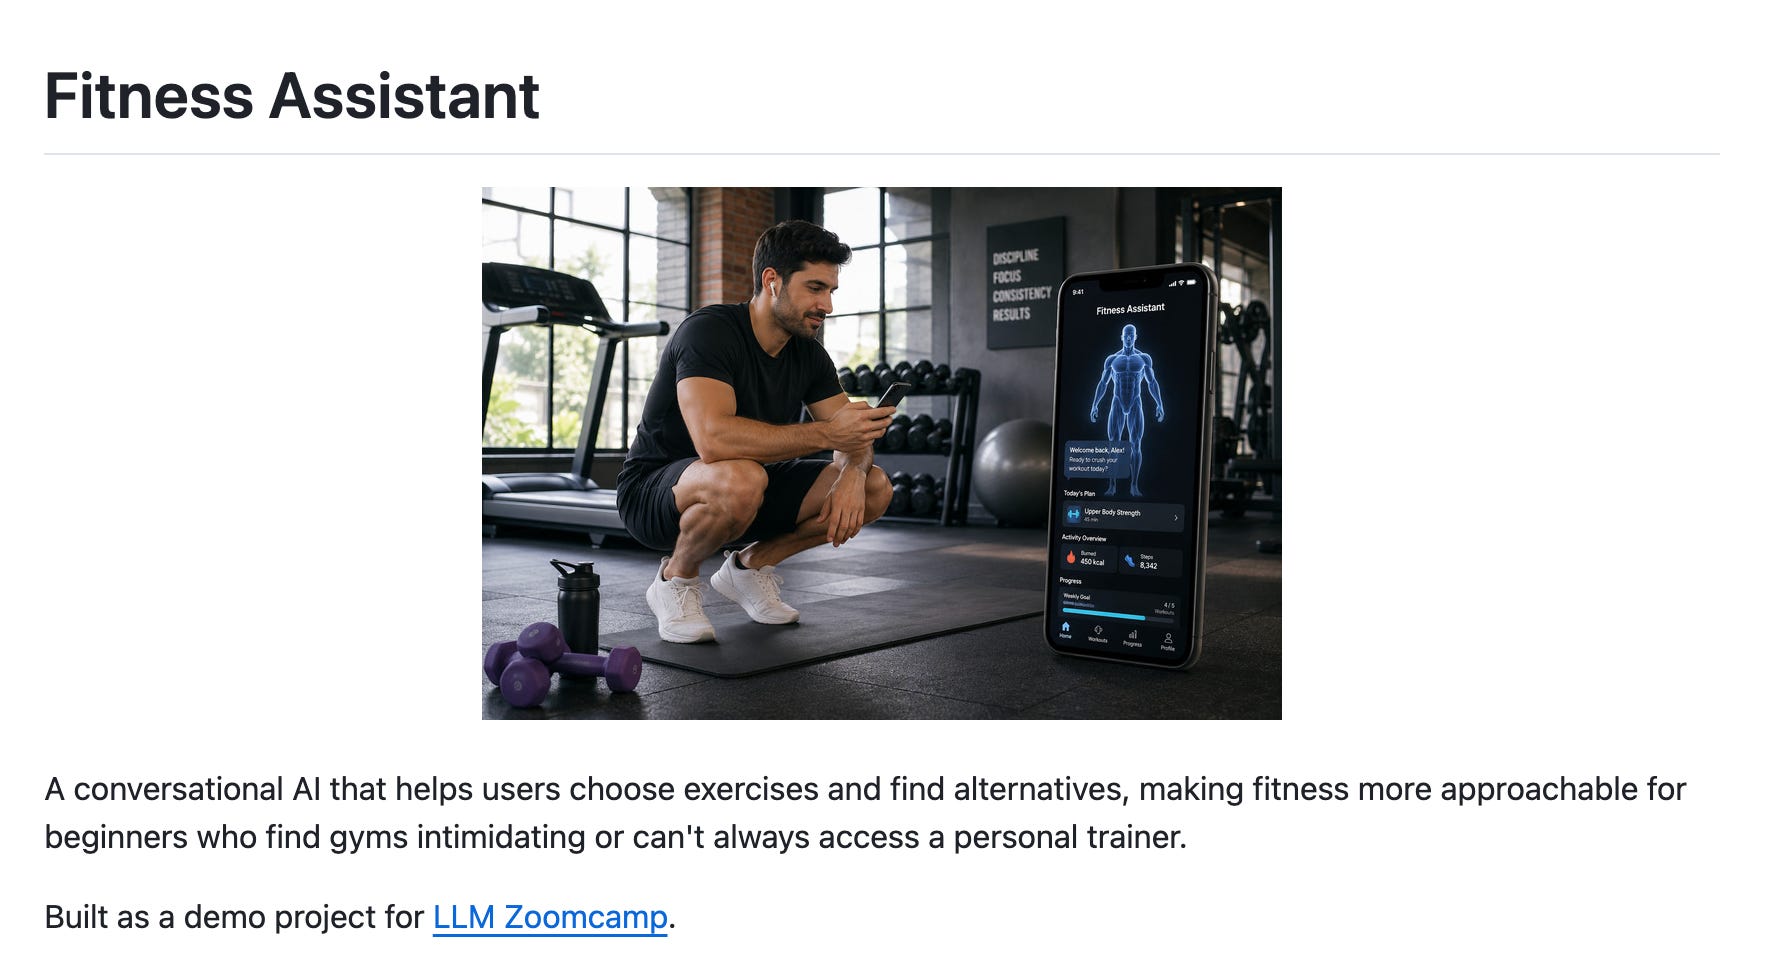
In two sentences, the reader learns:
The user: fitness beginners without regular access to a trainer
The problem: choosing exercises and finding alternatives can be difficult
The solution: a conversational AI assistant that provides guidance
The exact formula will vary by project, but a useful starting point is:
[Project name] is a [type of system] that helps [specific user] do [task or achieve an outcome].
You can add a second sentence to explain the main obstacle or why the project matters.
For example:
A support assistant that helps DataTalks.Club students find answers across course materials. It retrieves relevant information from the course knowledge base instead of requiring students to search through videos, documents, and Slack discussions manually.
Keep the description concrete. Phrases such as “AI-powered platform,” “innovative solution,” and “intelligent system” add little unless you explain what the system actually does.
If you struggle to write the description, generate several alternatives and compare them. You can ask an AI assistant to analyze the repository or to describe the project based on your notes. However, you still need to choose the version that accurately represents the project and makes sense to your audience.
2. Problem
The short description introduces the problem, and the problem section explains it.
Here’s a simple structure that works well:
What is the user trying to do?
What makes that difficult?
Why are the existing options insufficient?
Who experiences this problem?
For my Fitness Assistant project, the problem is described like that:
Beginners often struggle to choose appropriate exercises
Gyms can feel intimidating when someone does not know how to use the equipment
An exercise may be unsuitable because of an injury, missing equipment, or personal preference
Personal trainers can provide guidance, but they are not always available or affordable
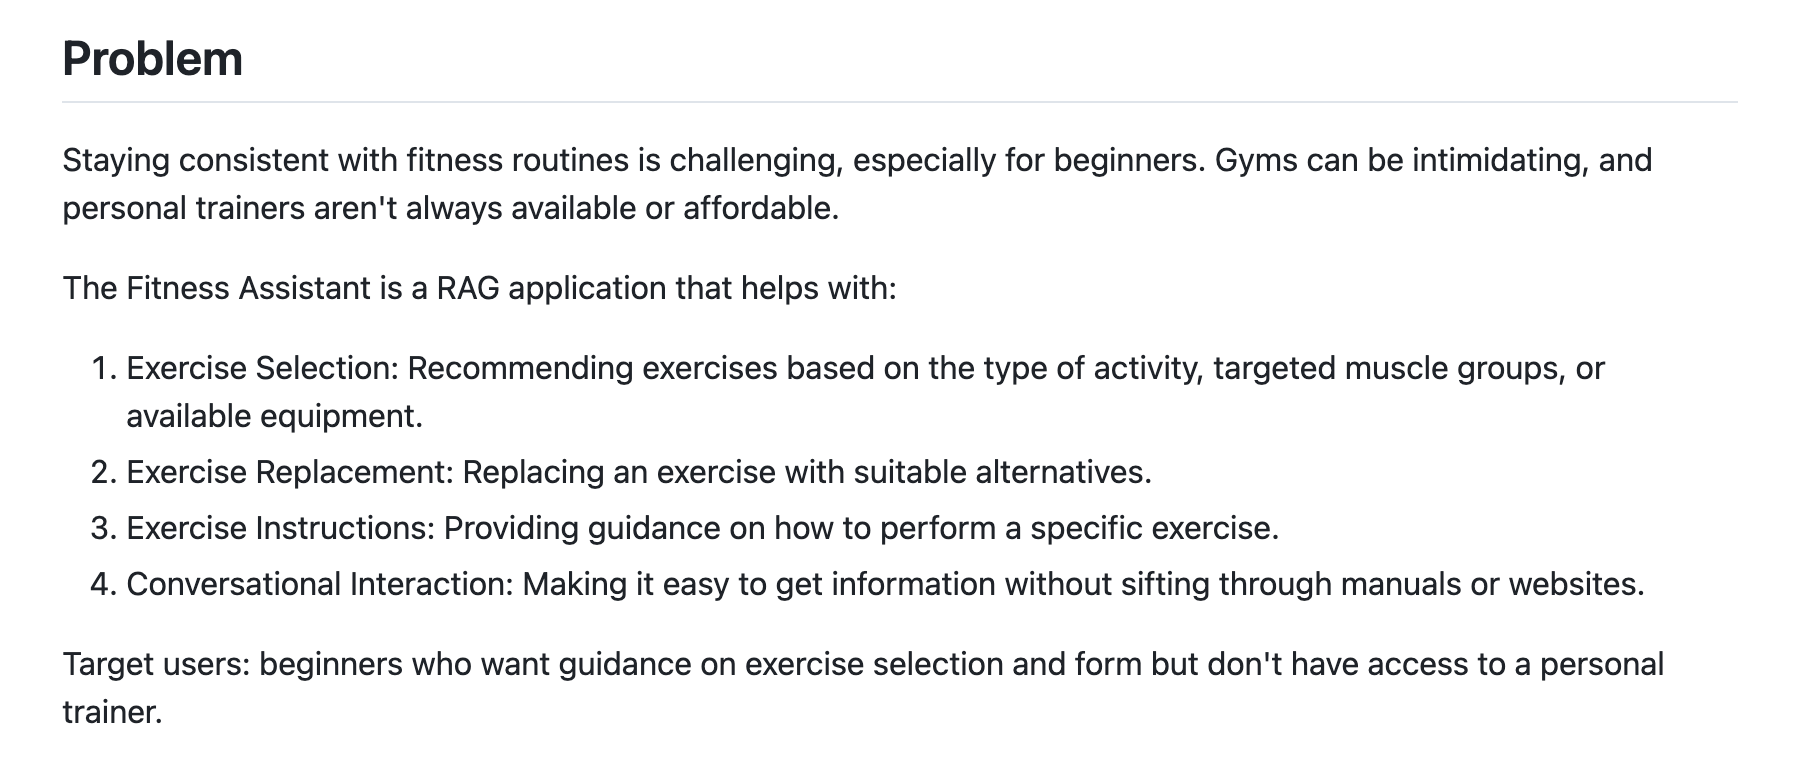
Keep this section proportional to the project. You don’t need a long market analysis for a small course project. A few specific paragraphs are usually enough to establish why the application exists and who benefits from it.
3. Demo
After you explain the project, show it working.
A reader should not need to install dependencies, create API keys, and start several services just to see what the application does. Many readers will decide whether to continue before they run anything locally.
You can demonstrate the project with:
Live application
Short video
GIF
Screenshots
Sample input and output
Use the format that best represents the project. A screenshot may be enough for a dashboard or static interface. A short video is usually more useful when the application involves several steps, dynamic output, or interaction with an AI assistant.
For an AI application, the demo might show:
User entering a realistic request
System retrieving or processing the relevant information
Application producing an answer
User providing feedback or asking a follow-up question
Keep the main demonstration focused. Show the core workflow first rather than spending several minutes explaining the repository structure or installation process.
You can cover evaluation results, monitoring dashboards, and architecture later in the video, but a reader should see the application working within the first few moments.
If the project is deployed, place the live link near the top of the README. A reader can then try the application without setting it up locally. Keep the video or screenshots as well because the hosted version may later become unavailable or require credentials.
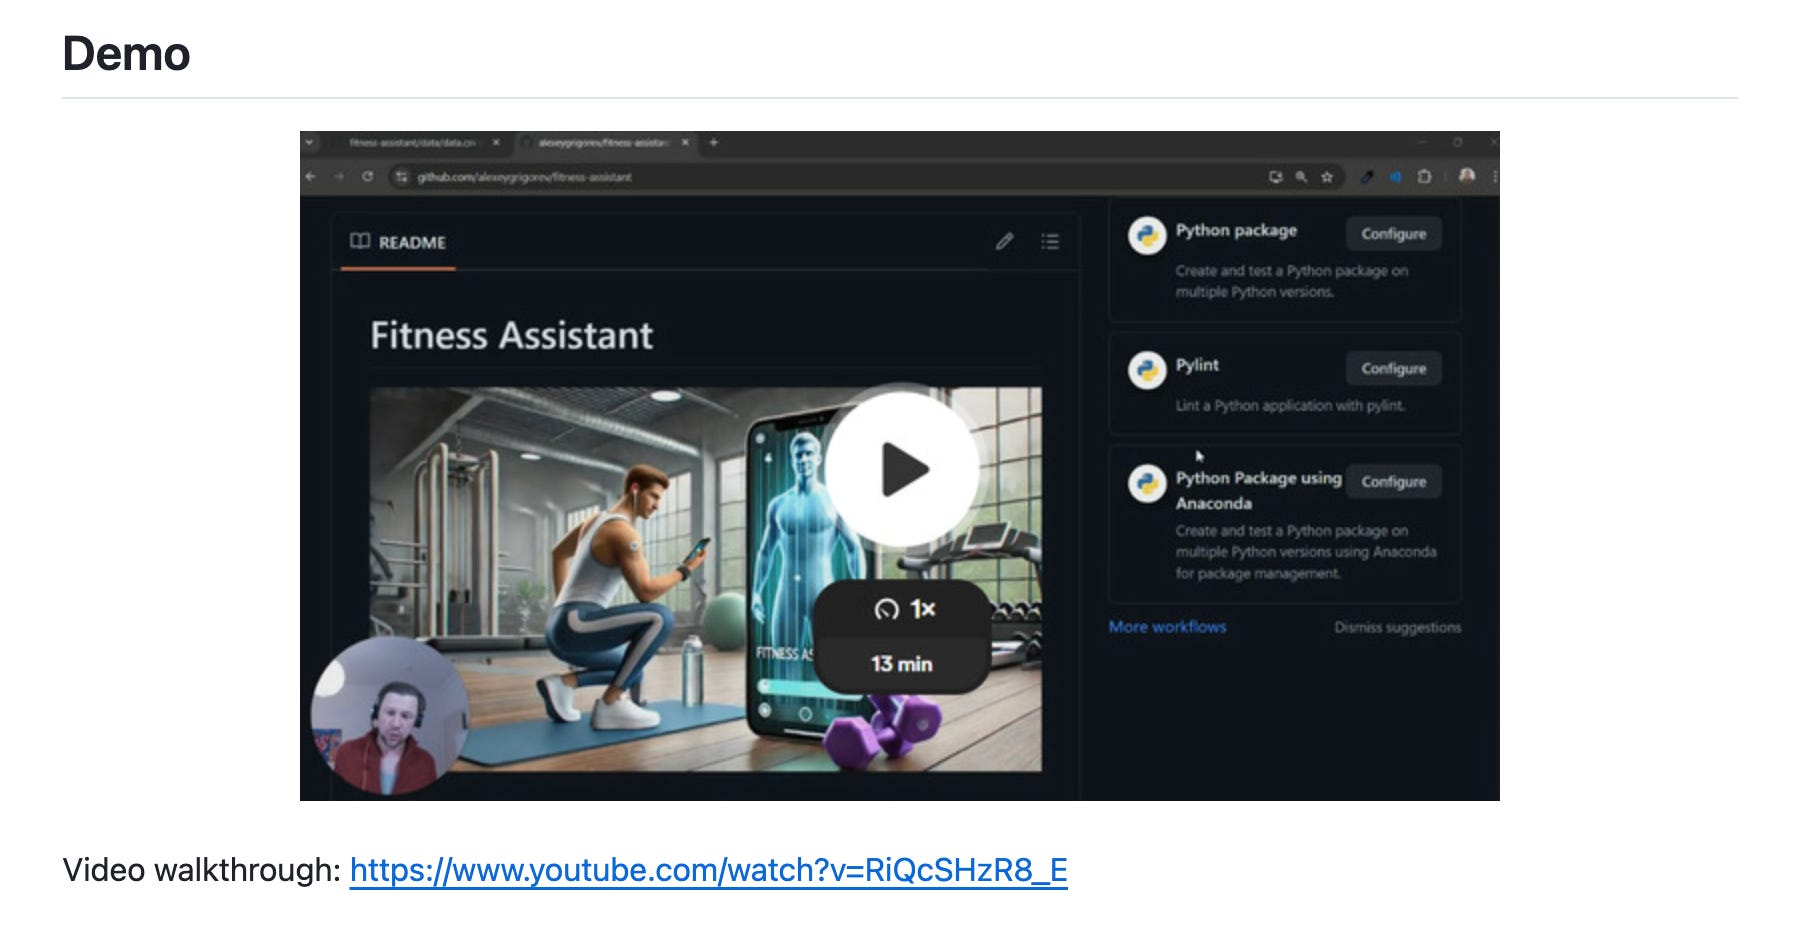
For Fitness Assistant, I recorded a video that shows the conversation flow and the main application features.
Part 2: Does it work well?
For an AI engineering project, readers need three kinds of evidence:
Evaluation: How well does the AI system perform?
Testing: Does the software behave as expected?
Monitoring: What happens when the application processes real requests?
1. Evaluation
Without evaluation, readers can see that the application generates answers, but they cannot judge how consistently or accurately it performs.
Describe the evaluation dataset and the kinds of cases it includes. The dataset should reflect the situations in which you expect the application to operate. A system evaluated only on simple, carefully written examples may perform poorly when users phrase the same requests differently.
Also explain what you changed after establishing the baseline. The result is more useful when the reader can follow the progression from the initial approach to the final one.
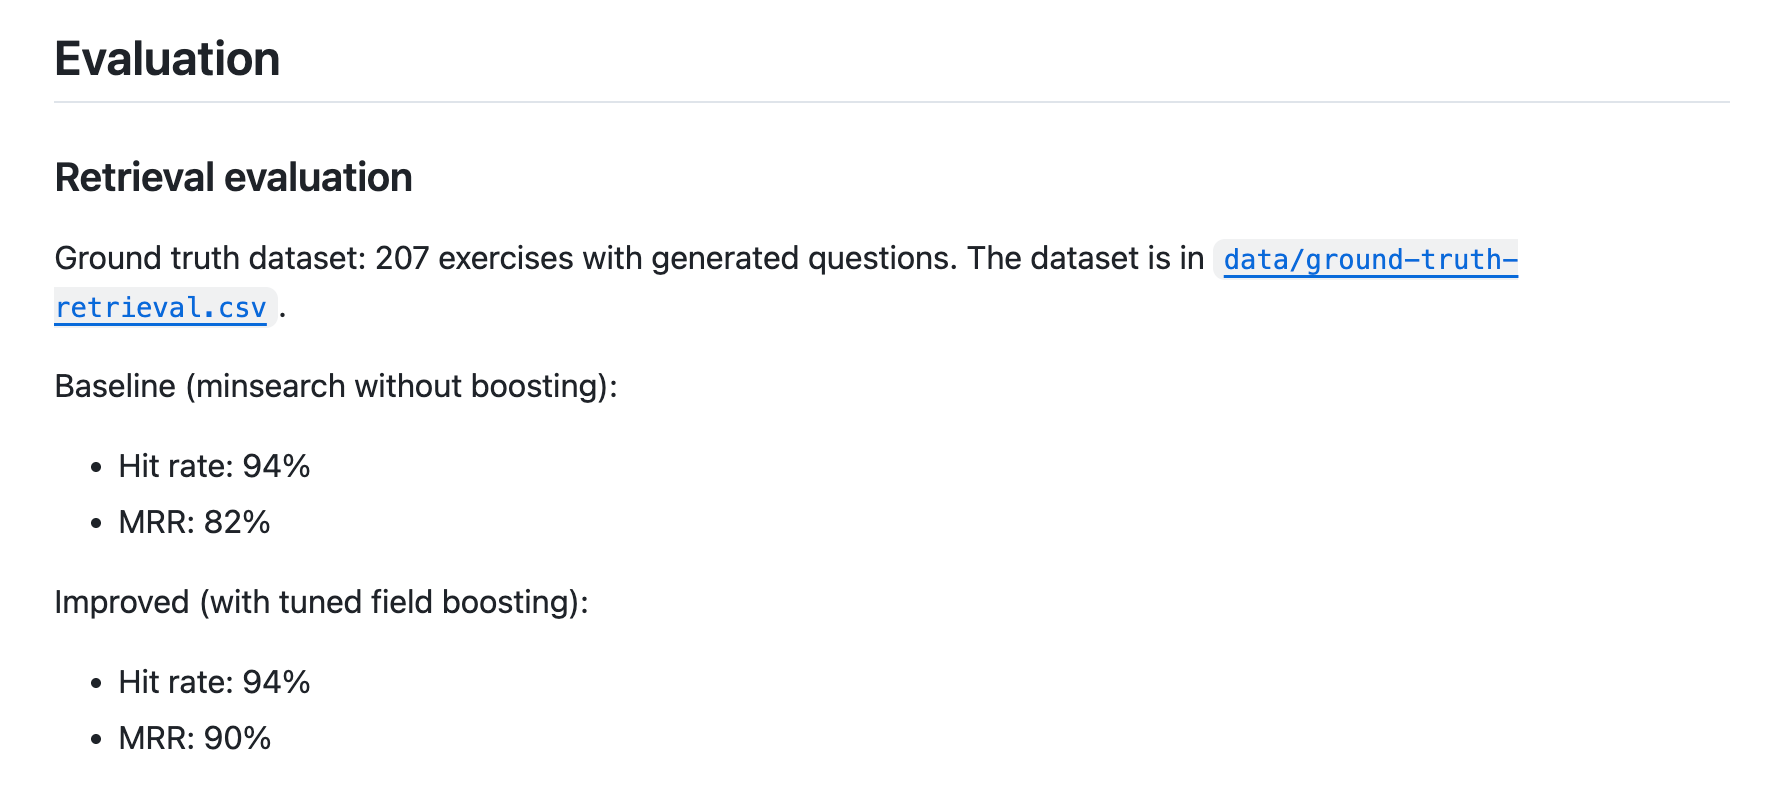
For my Fitness Assistant, the README reports both retrieval and end-to-end RAG evaluation. After adding field boosting, retrieval reached a 94% hit rate and 90% mean reciprocal rank. The final RAG flow produced answers classified as relevant in 83% of cases when using gpt-4o-mini. The README also includes the parameters that produced the best retrieval results and links to the evaluation notebooks and datasets.
Keep the summary in the README, but store the detailed code and results in a separate, clearly named location. Document how to rerun the evaluation so the reader can verify the results or test a different approach.
2. Testing
Explain which tests the project includes and how to run them with one command (if possible).
When the project requires additional services or configuration, state that before the command. A reader should not have to discover that the tests require a database, an API key, or a running container from the resulting error messages.
If the project does not have automated tests, say so. My Fitness Assistant currently has no automated tests. I list this as a limitation.
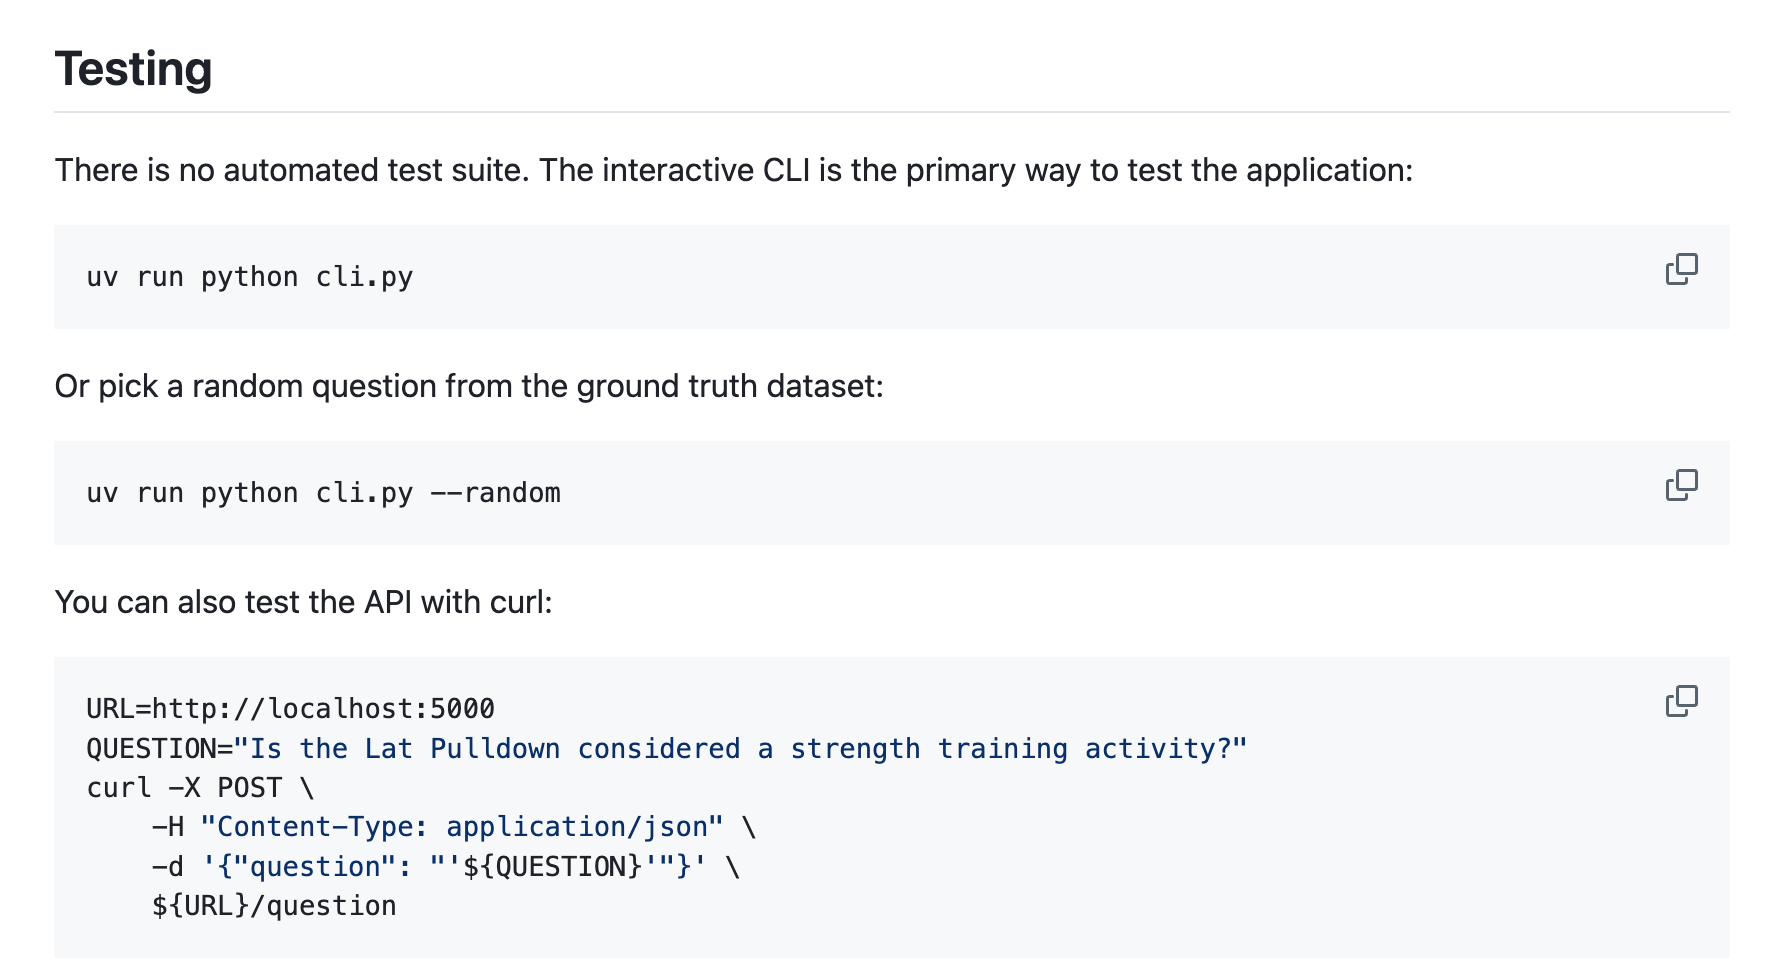
This tells the reader that I understand what is missing and prevents the README from suggesting that the project is more complete than it is. Honesty is more useful than vague claims when the repository contains no evidence to support them.
3. Monitoring
Evaluation tells you how the system performed on a prepared dataset. Monitoring helps you understand what happens after people begin using it.
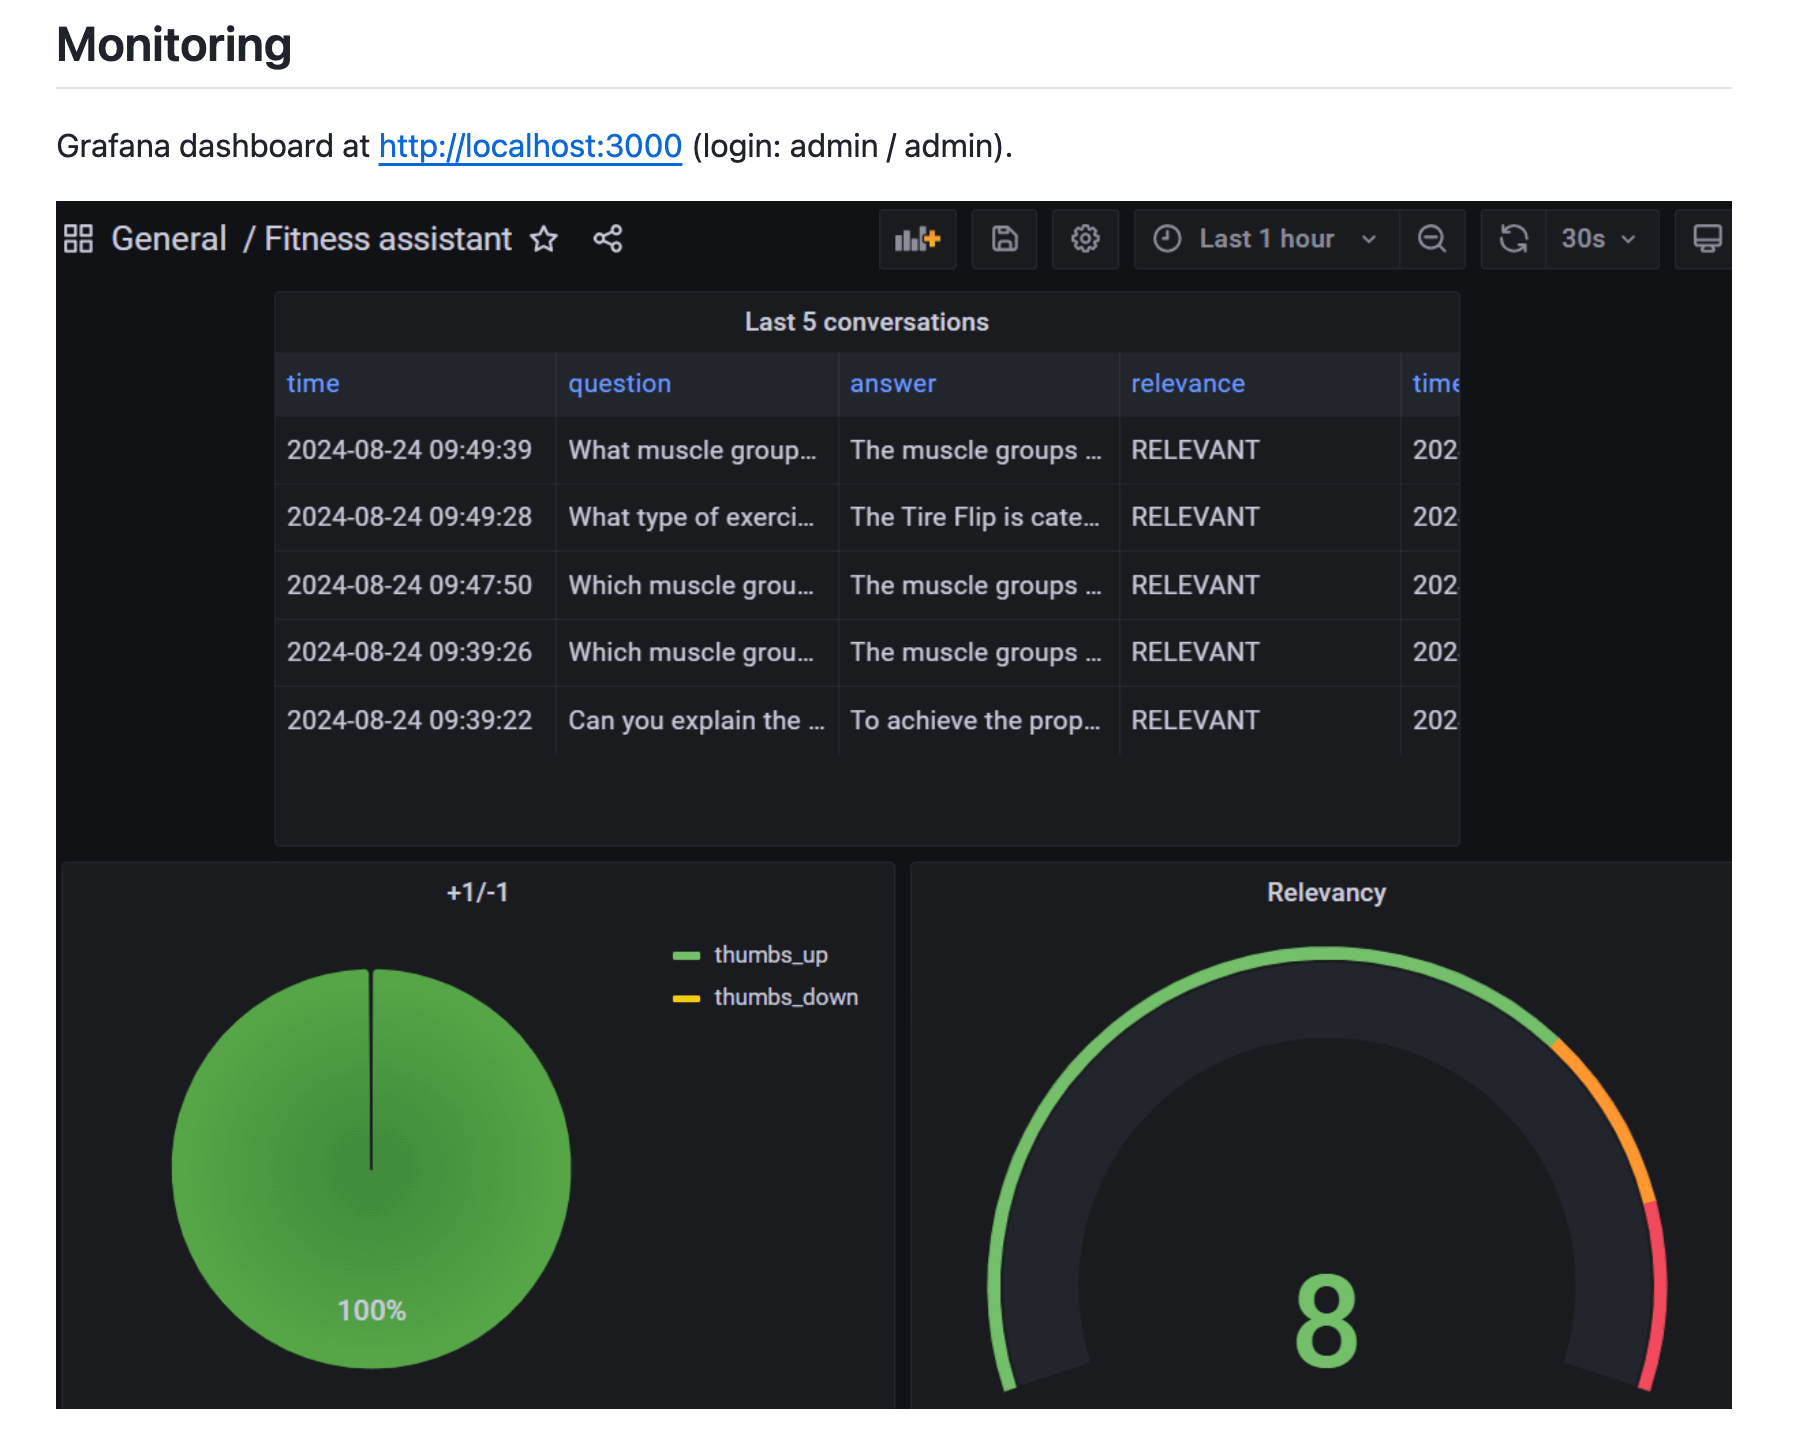
In the monitoring section, describe the metrics your system captures and where it stores them. Explain how a reader can view this data, which specific events or metrics you prioritize, and how these observations enable you to diagnose and resolve issues. If you have a dashboard, include a screenshot and explain what its panels show.
For Fitness Assistant, the application stores conversations in PostgreSQL and displays monitoring data in Grafana. The README includes a screenshot and explains the dashboard panels, which track:
5 most recent conversations
Positive and negative user feedback
OpenAI API cost
Token usage
Model used
Response time
Part 3: Can I run and reproduce it?
After readers understand what the project does and how well it performs, they may want to run it themselves.
1. Quickstart
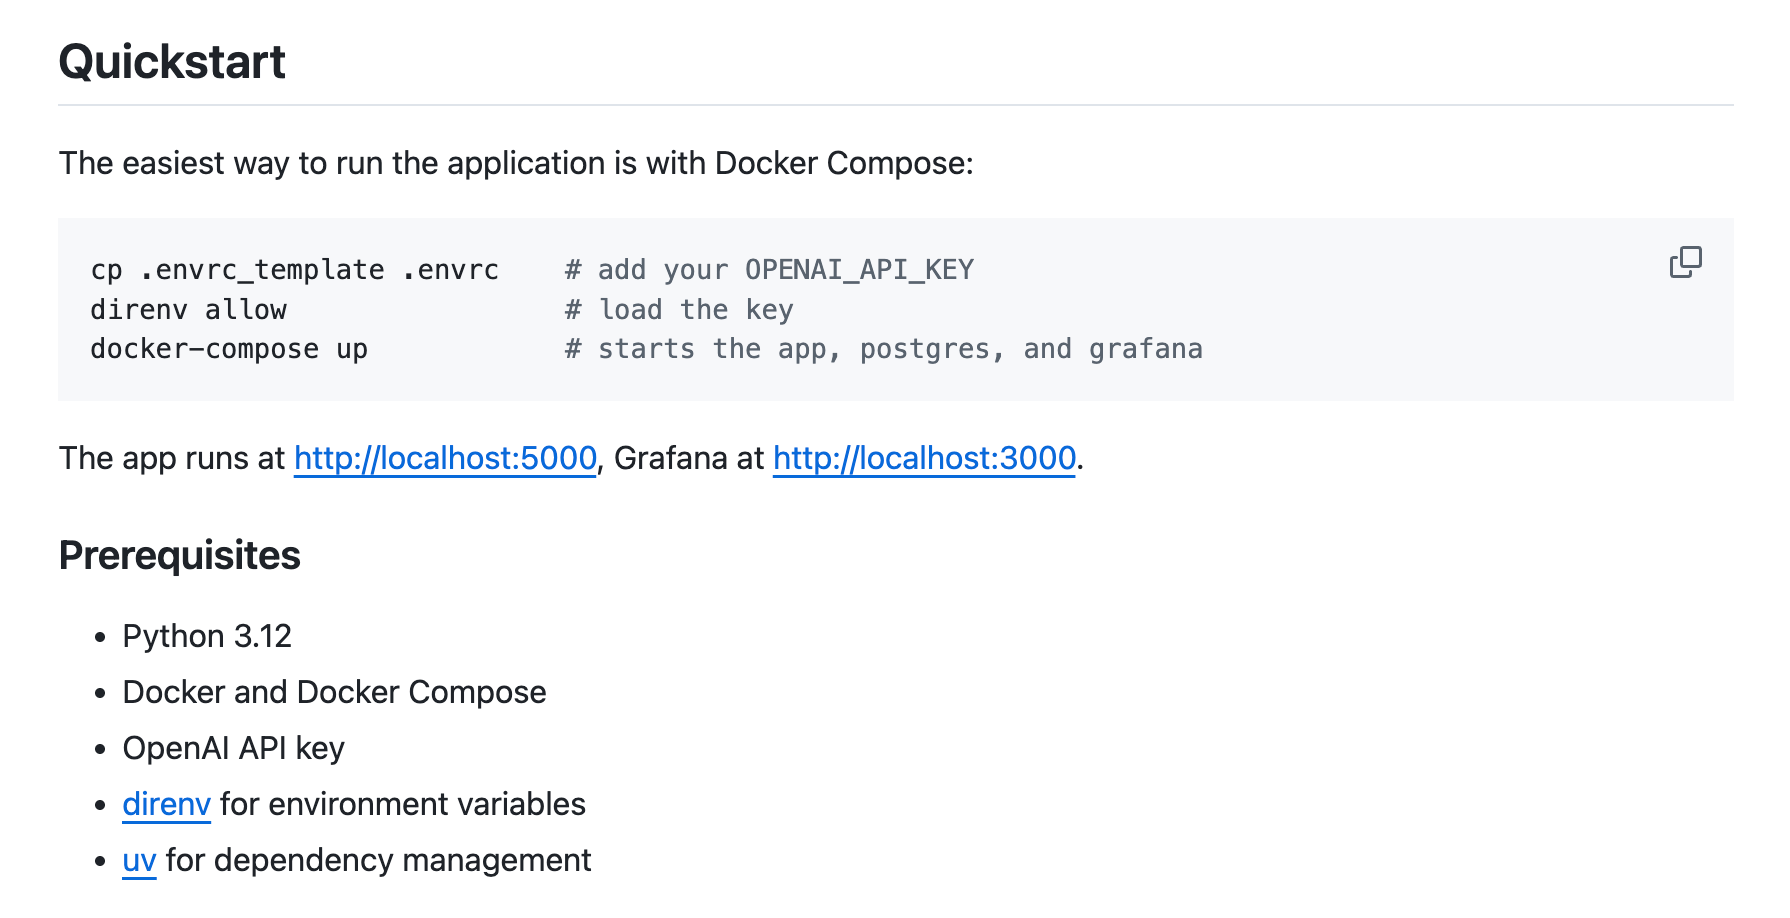
The quickstart should provide the shortest reliable path from a clean machine to a running application.
Include prerequisites, the repository clone command, dependency installation, environment configuration, required services, and the command that starts the application.
For example:
git clone https://github.com/username/project-name.git
cd project-name
uv sync
cp .env.example .env
docker compose up
It will also help to mention some core tools and technologies you used:
Python version
Package manager, such as uv, Poetry, or pip
Docker and Docker Compose
Node.js version, if the project includes a frontend
Database or system dependencies that do not run in containers
If the project supports several setup methods, show the recommended one first.
In addition to quickstart, also include:
Local development: detailed instructions for running services separately
Troubleshooting: solutions to common setup problems
2. Data and configuration
Many projects fail to run because the code is available, but the required data or configuration is not.
Document every external input the reader needs. Name the source, file, destination, and command when possible:
python scripts/download_data.pyFor configuration, list the required environment variables and explain what each one controls.
Provide an example file such as .env.example:
OPENAI_API_KEY=
POSTGRES_HOST=postgres
POSTGRES_DB=fitness
POSTGRES_USER=fitness
POSTGRES_PASSWORD=
Also, clearly state which settings are required and which are optional ones. A reader should know whether the application can start without a monitoring service, cloud account, or third-party API.
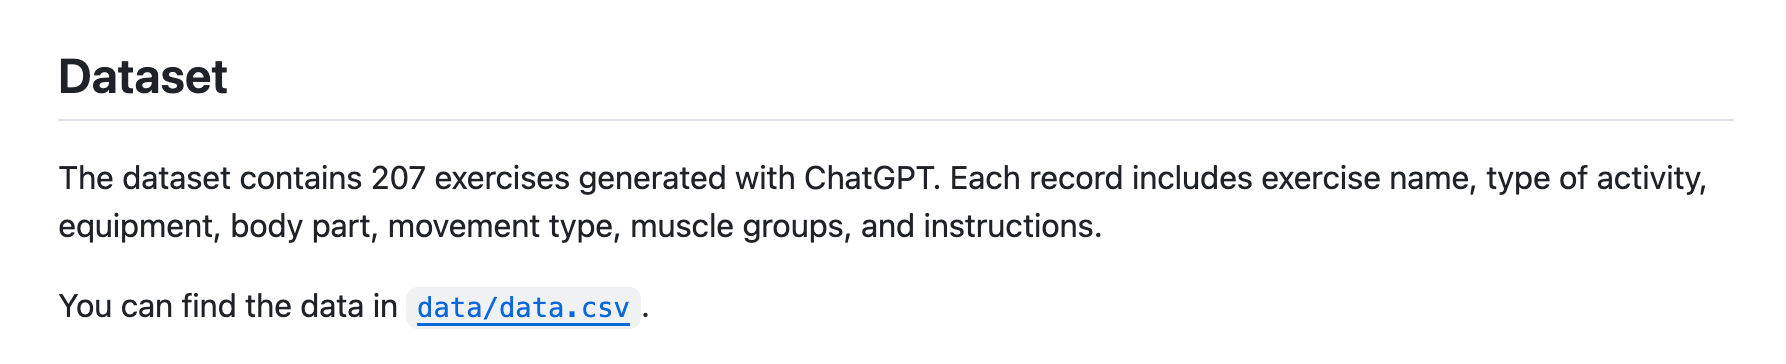
For Fitness Assistant, the README contains a description of a dataset that I used for creating the assistant.
3. Deployment
If the project is deployed, place the live URL near the top of the README, immediately after the title and description.
The deployment section itself should explain where the application is hosted, which services it uses, how deployment works, which environment variables or secrets are required, whether deployment happens manually or through CI/CD, how someone else could deploy their own version
Depending on the project, you might deploy it with Streamlit Community Cloud, Render, Railway, a managed container platform, or a virtual machine running Docker.
For example:
The API runs on Render, PostgreSQL is hosted on Neon, and the frontend is deployed on Vercel. A GitHub Actions workflow deploys the API after tests pass on the main branch.
If deployment requires several services, include a short description of how they connect. Link to longer deployment instructions when the process would make the main README too long.
Fitness Assistant does not currently have a public deployment. The README states this and provides two alternatives
Start the complete system with Docker Compose
Run the application and supporting services locally
Part 4: How was it built?
Once readers understand what the project does, how well it performs, and how to run it, they may want to inspect the implementation in more detail.
1. Architecture
Use the architecture section to show how data and requests move through the system.
You can create the diagram with Mermaid, an image, or a simple text-based flow. The format matters less than whether the reader can understand the system without first reading the code.
For Fitness Assistant, the architecture diagram shows how the main components interact:
A user sends a request to the Flask application.
The application uses minsearch to retrieve relevant exercises.
It sends the request and retrieved context to OpenAI.
It returns the generated answer to the user.
It stores the conversation and usage information in PostgreSQL.
Grafana reads the stored data and displays it in a monitoring dashboard.
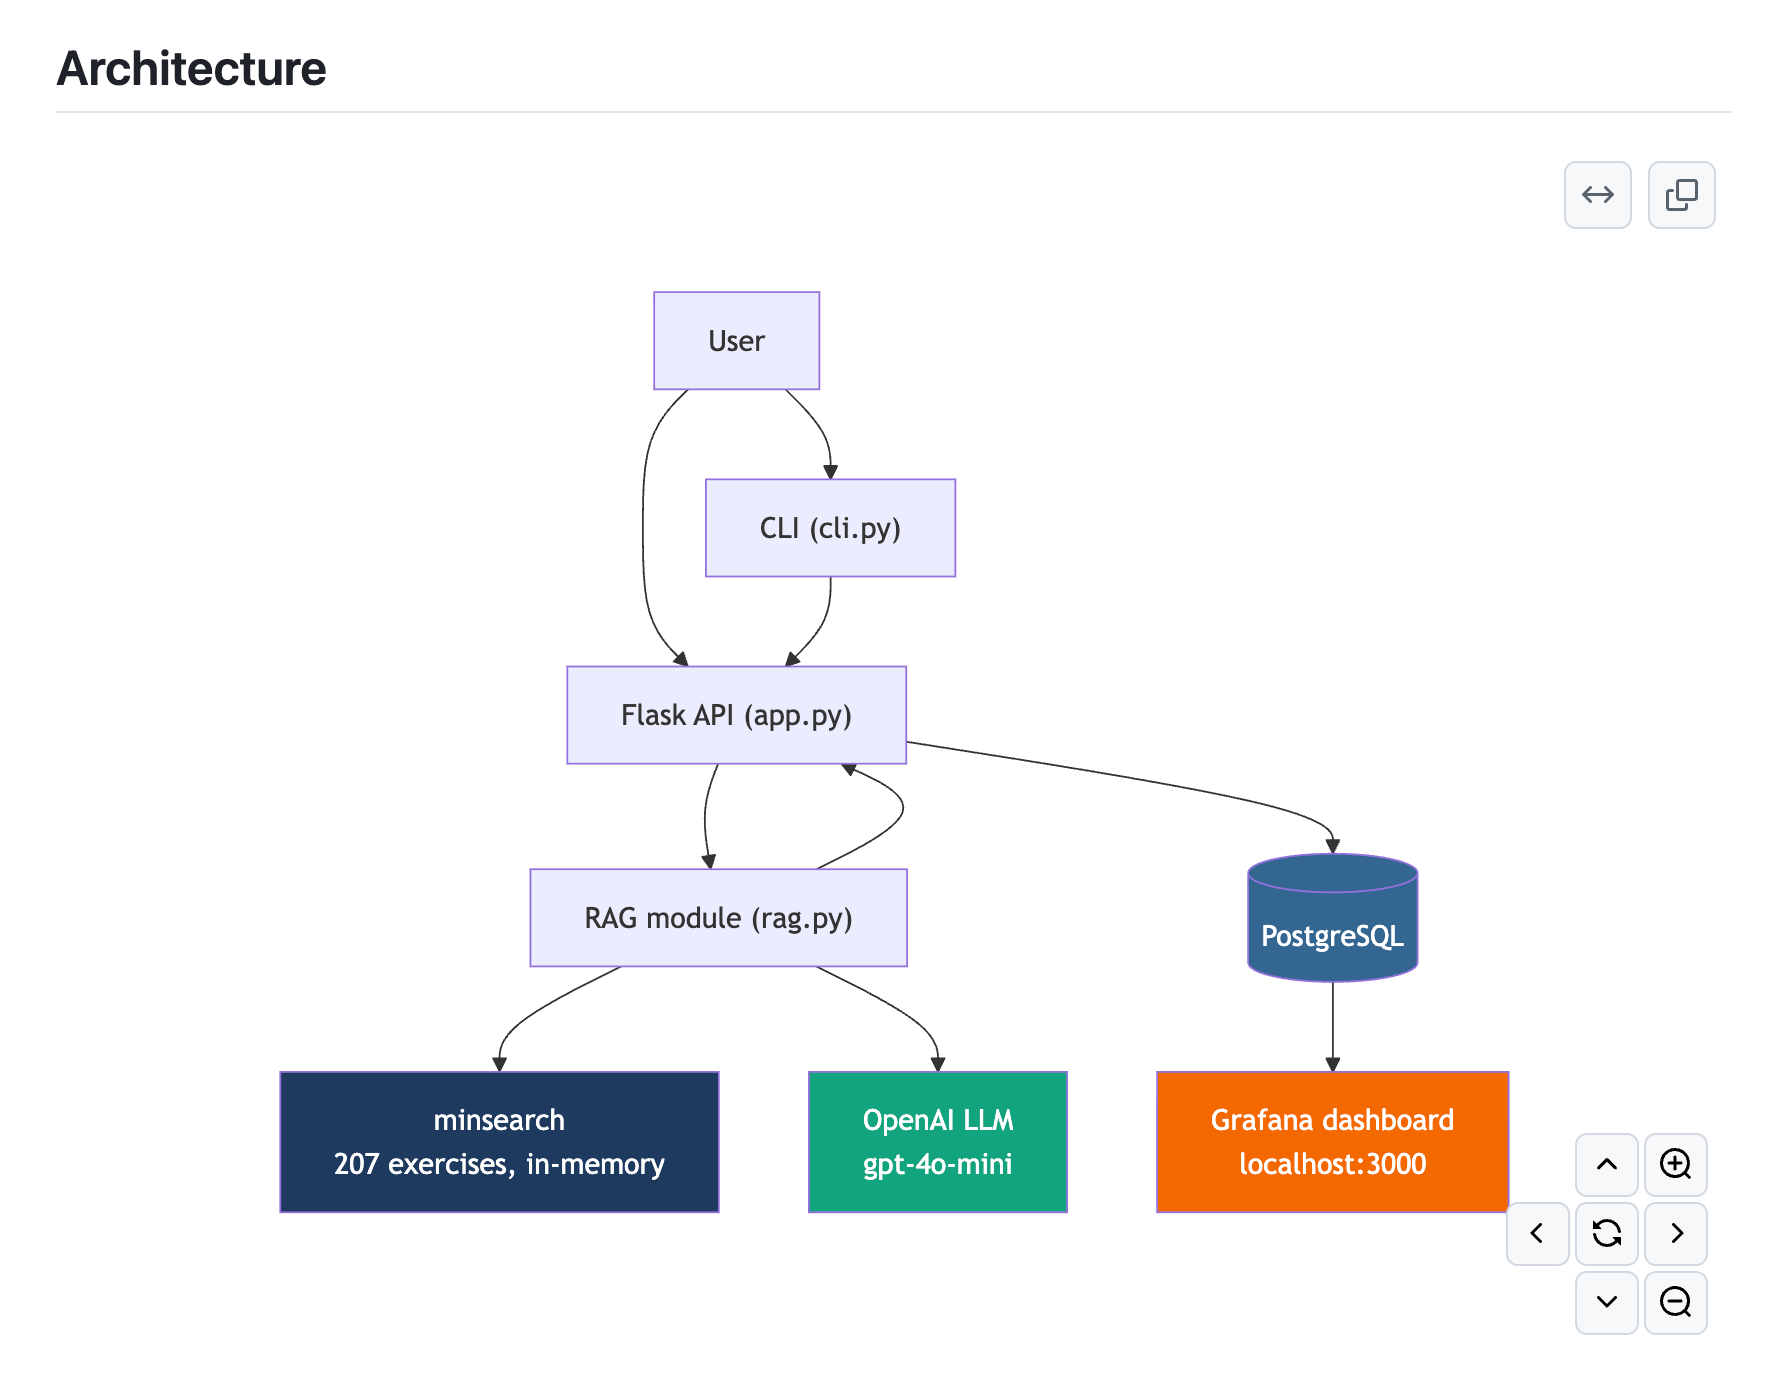
It also helps to add a short explanation below the diagram. Diagrams show relationships well, but they do not always explain why a component exists or what responsibility it has.
2. Project structure
The project structure section helps readers find the code behind the claims you make elsewhere in the README.
Include a simplified file tree with one-line descriptions:
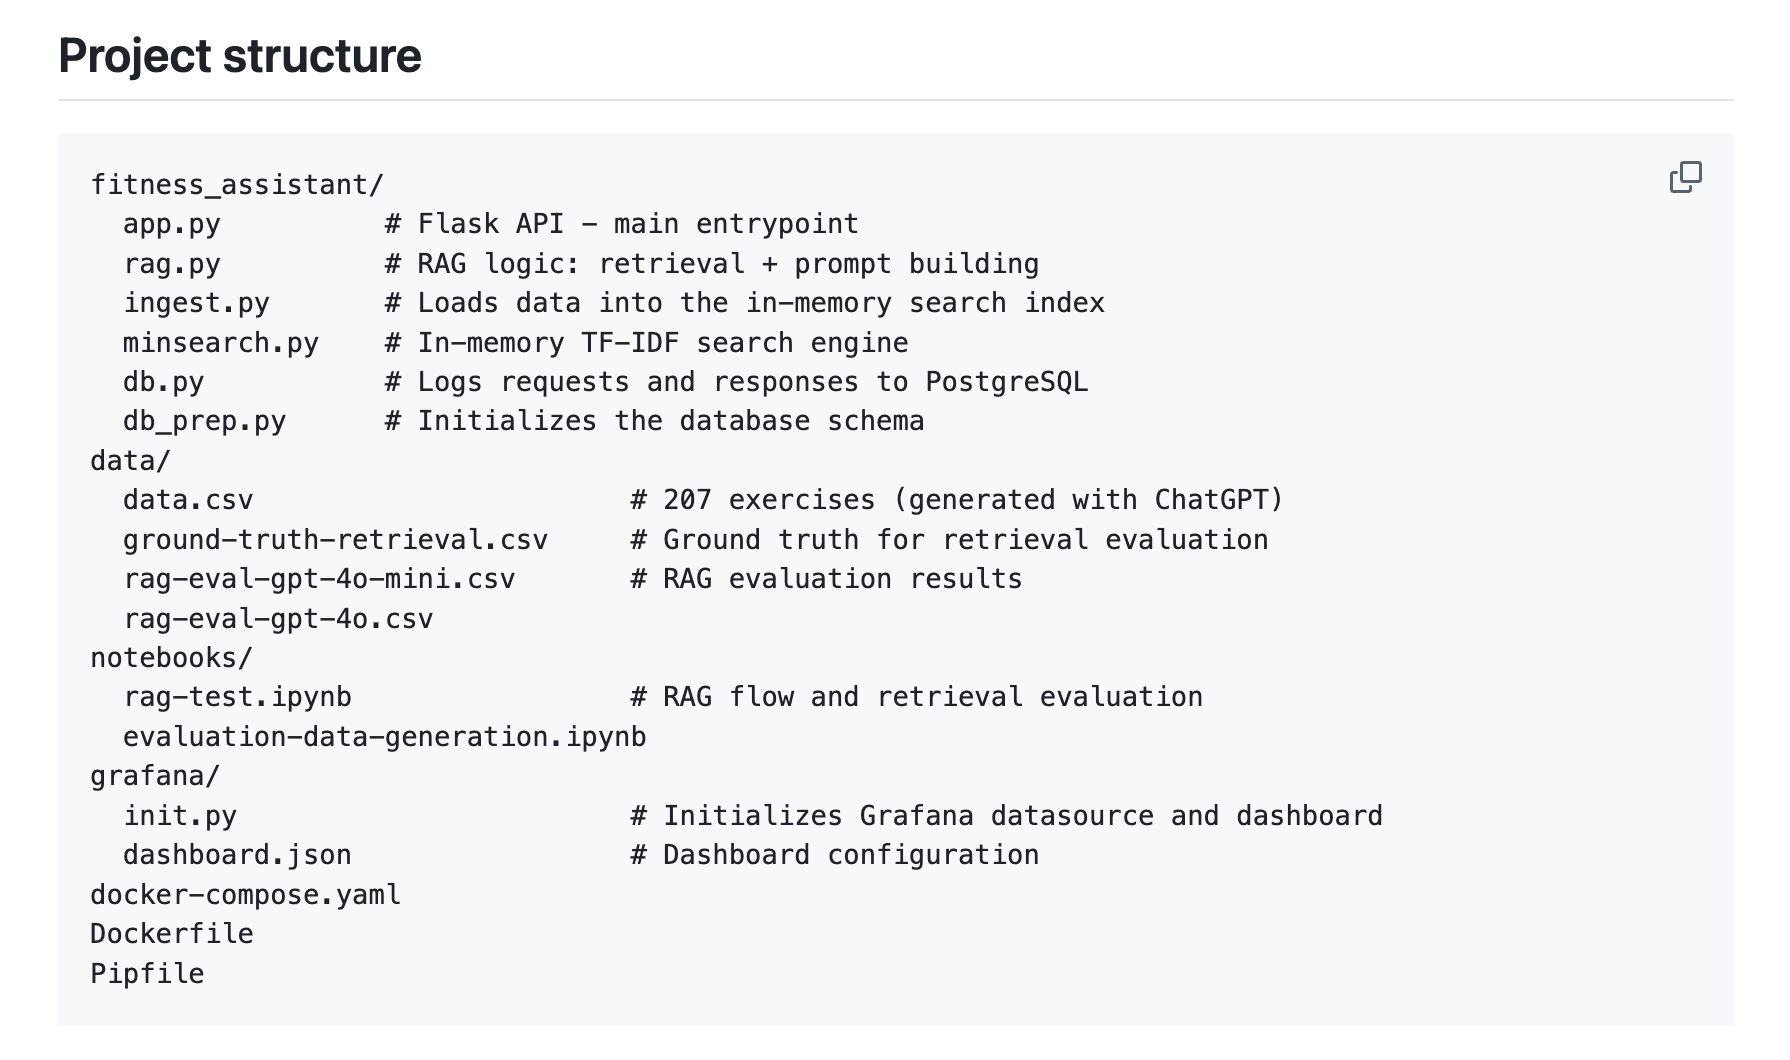
Do not paste the complete output of tree if the repository contains dozens of generated, configuration, or unimportant files. Show the paths that help the reader understand and navigate the project.
If you use notebooks, explain what each notebook contains. Names such as notebook1.ipynb or final_v2.ipynb give the reader little information. Prefer descriptive filenames, and state which notebook contains the reported results.
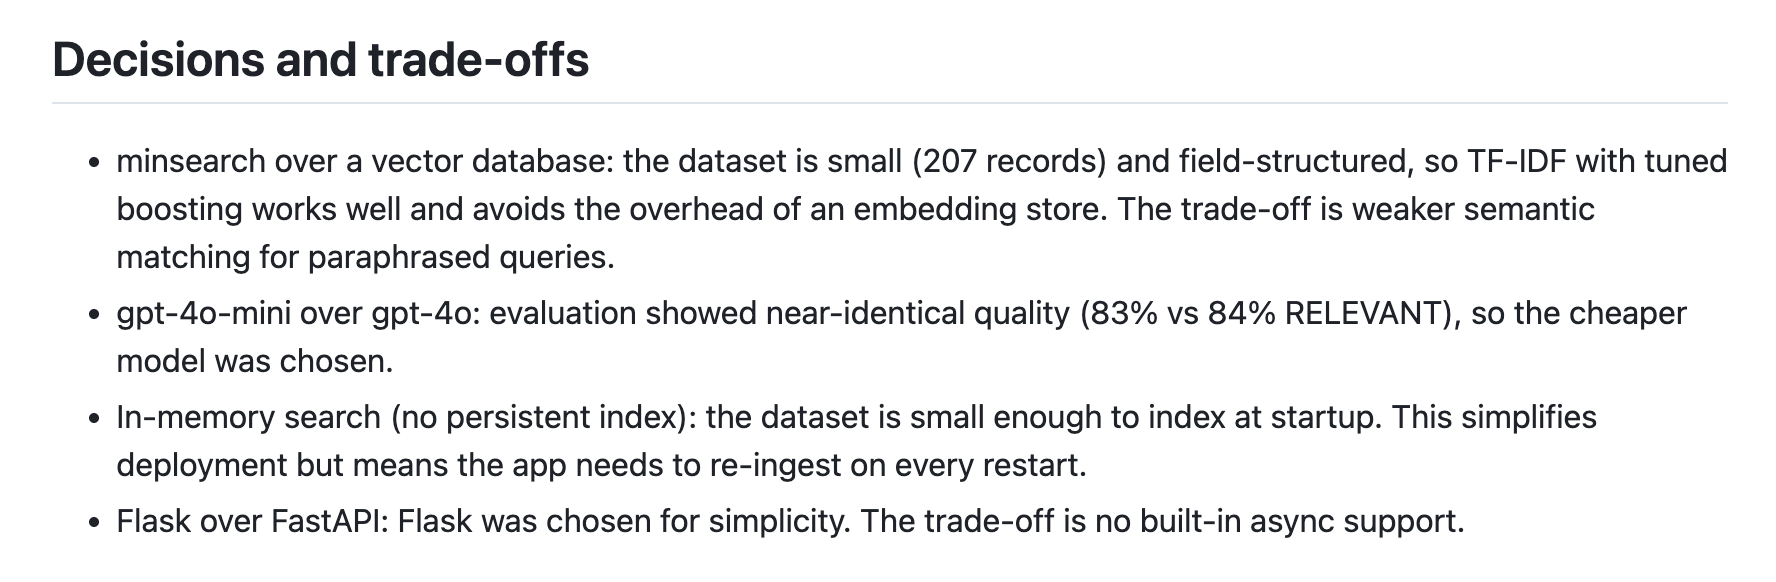
3. Decisions and trade-offs
The technologies you chose matter less than the reasoning behind them.
Describe the decisions that materially shaped the project, such as model selection, retrieval method, database choice, framework choice, etc.
A useful format is:
I chose X over Y because of constraint Z. The downside was A. I accepted it because B.
For example:
I used minsearch instead of a managed vector database because the dataset contains only 207 exercises and the project should be easy to run locally. This approach does not provide the scalability or indexing features of a production search service, but those features were unnecessary for this dataset.
Or:
I used gpt-4o-mini for the final RAG flow because it provided acceptable evaluation results at a lower cost than the larger model. The larger model performed better on some difficult cases, but the improvement did not justify the additional cost for this project.
4. CI/CD
The CI/CD section explains which checks and deployment steps run automatically.
At a minimum, document what triggers the workflow, which checks run, what happens when a check fails, and whether successful changes are deployed.
For example:
On every pull request, GitHub Actions installs the dependencies, runs the test suite, and checks code formatting. Changes cannot be merged until these checks pass.
AI evaluations can be slower and more expensive than conventional tests, so you may not want to run the full evaluation suite on every commit. You could run a smaller set on pull requests and the complete evaluation before a release.
If deployment is automated, describe the sequence. Link to the workflow files so readers can inspect the implementation.
If the project has no CI/CD, do not create a section that implies otherwise. You can mention its absence under limitations instead.
Nice to have: What is the project scope and its limitations?
A good README also helps readers understand where it stops.
Describing these boundaries shows that you can assess your own work realistically and distinguish between what you implemented, tested, and only considered.
1. Limitations
Use the limitations section to explain what the project does not currently handle well.
Be specific. Name the boundary and its consequence:
The knowledge base contains 207 exercises generated with ChatGPT. It covers common strength exercises but may omit less common movements or contain inaccurate descriptions.
Or:
The application does not authenticate users, so the current version is suitable for local demonstrations but not for a public deployment that stores personal data.
For Fitness Assistant, the limitations include the absence of automated tests and a public deployment. The dataset is also relatively small and synthetic, so the application cannot provide complete or medically reliable exercise advice.
Do not hide a known weakness behind vague wording. At the same time, do not turn the section into an apology. State the boundary plainly and explain its practical effect.
2. Future work
Future work should follow from the limitations or from the evidence you gathered while building and evaluating the project.
Keep the list realistic and prioritized. Explain what you would change and why:
Add evaluation cases for requests involving injuries and equipment limitations because the current dataset contains too few examples of these scenarios.
3. Self-evaluation
For a course project, you may also include a self-evaluation against the project rubric.
Go through each criterion, state the score you believe the project earns, and point to the evidence that supports it.
This helps the reviewer navigate the repository and shows that you assessed the project against the same criteria they will use.
Do not award points without evidence or treat the self-evaluation as the final score. The reviewer still needs to verify your claims and make an independent judgment.
A self-evaluation can also reveal gaps before submission. If you cannot point to evidence for a criterion, either improve the project or adjust the score you claim.
You can use an AI assistant to perform an initial review of the repository against the rubric. Ask it to identify the evidence for each criterion and flag anything it cannot verify. Then check every conclusion yourself because the assistant may overlook files, misunderstand the implementation, or give credit for features that are only mentioned but not implemented.
Common mistakes
I see the same README problems across course projects in almost every cohort:
Missing setup instructions. If I cannot run the project from a clean clone, it loses points on reproducibility.
No evaluation. An AI application without evaluation is only a demo.
No demo. If readers have to run the code before they can see what it does, many will not.
Important work is buried in notebooks. Link to the evaluation, prompts, experiments, and results from the README.
A stale README. The commands, screenshots, metrics, and deployment links should match the project’s current version.
A wall of text. Use clear sections, screenshots, diagrams, commands, and concrete results to make the README easy to scan.
Planned work is described as implemented. Use the present tense only for features that already exist. Put unfinished ideas under limitations or future work.
A README written as an afterthought. A list of technologies and a few setup commands is not enough. Explain the problem, show the project, and provide evidence that it works.
Using AI to write and review the README
A coding agent can inspect your repository and help draft the README, but do not publish the first version it generates.
Start by asking it to identify the main application flow, setup commands, configuration, tests, evaluation, monitoring, and deployment files. Then use that information to draft one section at a time for a specific audience.
For example:
Draft three short project descriptions for an ML engineering hiring manager. Each should explain the user, problem, and solution without starting with the technology stack.
AI can also review the finished README against the repository or a course rubric. Ask it to flag unsupported claims, missing files, incorrect commands, undocumented environment variables, and criteria for which it cannot find evidence.
Do not force every section from this article into the README. Include only what is relevant to the project, and order the sections according to what your reader needs most.
Finally, verify everything yourself. Coding agents can invent commands, misunderstand the architecture, describe planned features as implemented, or report outdated results. Run every command and check every number, path, link, and claim before publishing.
Good project examples
Here are a few strong READMEs from AI Engineering Buildcamp and LLM Zoomcamp participants:
AI Diet Coach: Clear problem statement, live demo, screenshots, architecture diagram, and monitoring dashboards.
Research Radar: Strong one-line description, clear evaluation results, parameter tuning, deployment, CI, and 67 tests.
CineRAG: Separate retrieval and answer-quality evaluations, with datasets, metrics, results, and instructions.
Applied ML Teaching Copilot: Detailed evaluation process, 60 test scenarios, clear test separation, and self-evaluation against the rubric.
Other good examples:
More projects are available on the AI Engineering Buildcamp Cohort 3 and LLM Zoomcamp 2025 project pages.
What I’ve Been Working on This Week
AI Dev Tools Zoomcamp 2026 starts on August 31
Registration is open for the next cohort of AI Dev Tools Zoomcamp.
This is a free hands-on course about using AI developer tools in real software development workflows.
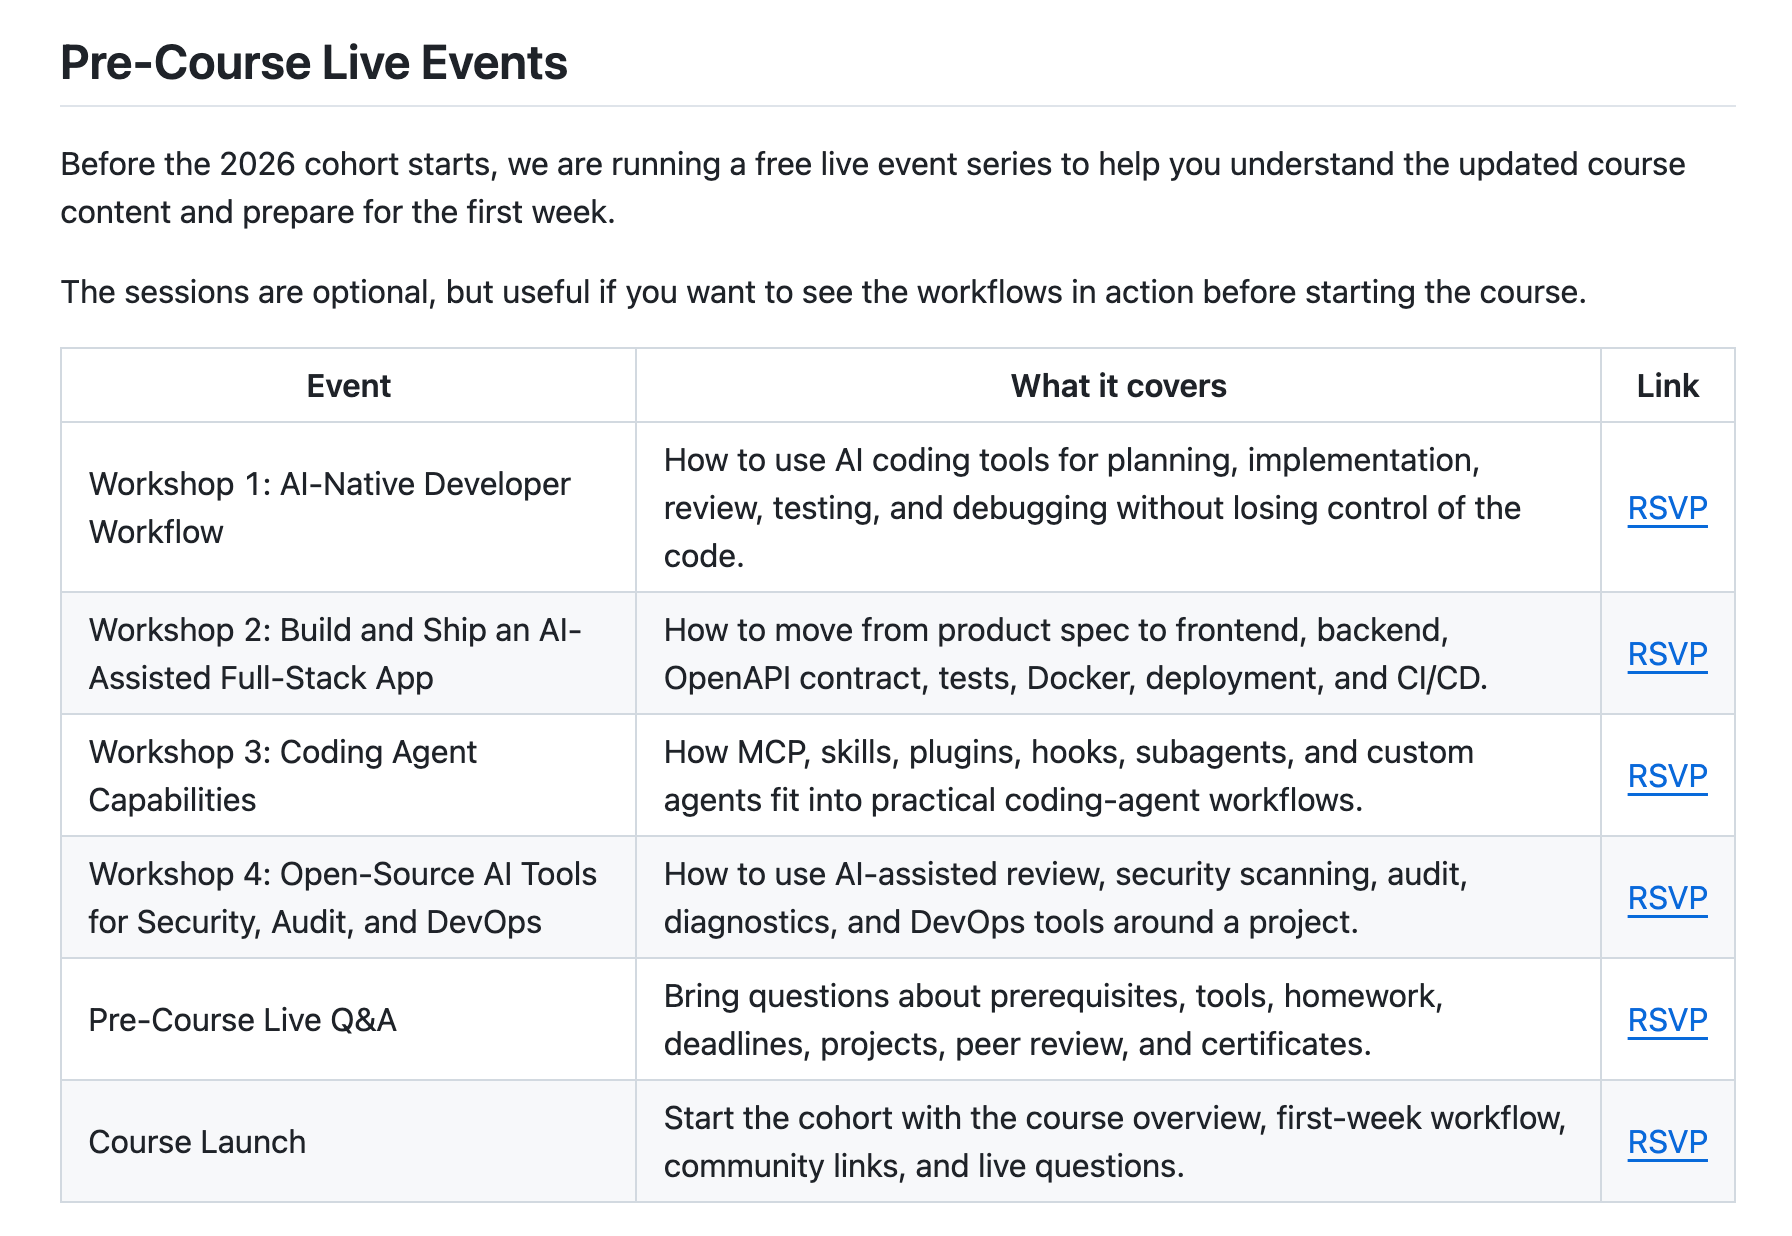
I’m preparing the 4 new workshops to update all of the course content:
AI-Native Developer Workflow: Using AI Tools Without Losing Control
Coding Agent Capabilities: MCP, Skills, Plugins, and Custom Agents
Join me there and register for the 2026 cohort.
Resource: Turn AI agent traces into useful data
Coding agents such as Claude Code, Codex, and Copilot produce detailed traces about sessions, model usage, tool calls, token consumption, and cost. In this hands-on LLM Zoomcamp workshop, Alona shows how to turn those raw logs into structured data and dashboards.
You’ll learn how to:
Ingest local coding-agent traces and logs from an API
Build data pipelines with dlt and load the results into DuckDB
Explore usage, models, projects, and token consumption in Marimo dashboards
Deploy pipelines and reports so they can run regularly and be shared with a team
The workshop is part of LLM Zoomcamp, but you can follow it independently.
Edited by Valeriia Kuka
Your post was the need of the hour as I am moving towards project phase in the LLMZoomcamp course. The third audience "future self" is something I overlook, many a times I spend a lot of time recalling my own project for interview preparation :) and I liked the thought of being honest and transparent in the projects that we build and updating them in README !! Thank you for this useful article.
Definitely have to read this later. I wonder how much crossover is there with my skill — https://github.com/petersimmons1972/auto-spicy-github